Friday, March 5, 2010

Monkey Bread!?


I just want to thank everyone for supporting this blog and my idea to home-school myself in the art of baking. I was really touched by the comments left by everyone on my blog. Shagufta, your comment was incredibly supportive and it really motivated me to go further with this venture! Dee, thanks so much for your regular comments and encouragement; It means so much to me!


Moving on, today I baked "Monkey Bread"!

When I first saw the name "monkey bread," I was confused and thought that the bread was called "monkey bread" because it probably contained bananas, but boy was I in for a surprise!

Monkey bread, is a loaf of bread made up of little buns that taste like clouds of cinnamon and sugar. Trust me, this loaf of bread might not look like a glorious melt in the mouth breakfast pastry, but it is!

It is not certain where the name monkey bread comes from, personally I think it looks like a monkey, but people say it's because you have to pluck the pieces of bun and gobble it all up at once (like a monkey).

To make this bread you have to follow the same steps I used to make the traditional loaf I made yesterday; but to make it simpler for y'all I have started from step 1. I hate it when cookbooks to refer to certain recipes and you have to keep flipping the page. I will do no such thing.

Ingredients:
  • 1/4th cup warm water (please make sure the water is not boiling hot or too warm as I have learned the hard way that it kills the yeast; and you don't want to kill your sugar-loving friends)
  • 1 tsp sugar
  • 1 tbsp active dry yeast
  • 1 cup of warm whole milk (this means no slim milk!)
  • 2 tbsp of butter
  • 3 cups of bread flour or unbleached all-purpose flour
  • 1 and 1/2 tsp salt
For the monkey part:
  • 1/2 cup of butter
  • 1 and 1/4 cup powdered sugar
  • 4 tsp cinnamon powder

  1. Mix, rest and knead the dough:
    • Mix the water, yeast and sugar in a small bowl and whisk to blend. The mixture should sit for 10 minutes till the yeast is active, foaming and bubbling.
    • In another bowl mix the butter and milk.
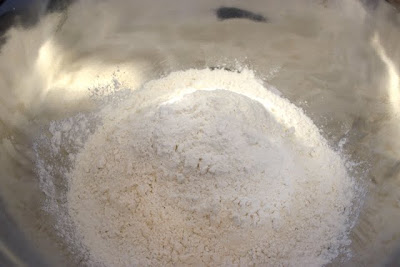
    • In a larger bowl mix the flour and the salt.
    • Now pour the yeast mixture and the milk mixture into the flour and the salt.
    • Mix for about 2-3 minutes till the dough comes together.
    • Cover the bowl with a damp cloth (use a lint-free cotton towel; if you do not have one use plastic wrap)
  2. Rise the dough - first rise:
  • Lightly oil another large bowl.
  • Scrape the dough into the bowl and lightly coat the surface of the dough with oil.
  • Cover the bowl with a damp lint-free cotton towel or plastic wrap for about 45-60 minutes or till the dough has doubled in size


  • Punch the dough

    • Turn the dough onto a lightly floured work surface.
    • Press the dough down firmly so as to expel some of the air bubbles but don't knead the dough again or it will be too springy

  • Making monkey bread

    • Till now, we've been working with the steps to make regular bread, now make a rough rectangle with the dough on your work surface.
    • Using a pizza cutter, scissors or a knife, cut the rectangle into smaller sections, roughly the size of fresh cherries. Mine turned out to be slightly larger cherries; more like baby potatoes.
    • Melt the butter in one bowl and in another and mix the sugar and cinnamon together.
    • Dip the balls of dough into the butter and then roll it in the cinnamon and sugar so as to coat it.
    • Line the bottom of the pan and fill your way to the top with the coated dough balls.
    • Pat them down once the pan is full.
    • Cover them with a damp lint-free cloth and let it rest for about 20 minutes.
    • Bake at 375 degrees fahrenheit / 190 degrees celsius for about 40 minutes.
    • Done!

    Thursday, March 4, 2010

    Bread


    This post is going to be slightly longer than my usual posts. This is because, about two days back my quest to enter college this summer or fall was rudely interrupted by the fact that many culinary arts colleges in America provide little to no financial assistance. I am not making a negative statement against any of the colleges that I was interested in but it was a sad revelation of sorts. Since they did not provide any financial aid,  I studied the other options most of which revolved around the idea of getting an educational loan. With the collapse of the economy it's easier to find the Holy Grail than get an educational loan if you are a non-citizen. Apparently, foreigners enter the country, take loans, have booze parties and leave the country, like any other self-respecting human being. OK! Now that that's out of the way here's today's post:

    Due to the above stated dilemma, I, Sandhya Sethumadhavan, have decided to educate myself on the culinary arts in the comfort of my home and kitchen. Sandeep had  bought me a book on baking when we were dating and at that time due to college I had little to no time to actually pay attention to it. I have taken it upon myself to use this book diligently and gain all the culinary wisdom it has to offer. My Amma, Acha, Etta, Chechi & husband have been supportive enough to play along with my silly whims and fancies and actually pretend that I'm home-schooling myself to become SUPERBAKER! Which will be a promotion from my current status as personal chef. Everyday, except weekends (c'mon, even college students get a break) I will learn a new chapter in the art of baking. I will post my lessons on my blog so that you can be a part of my process and like every good designer knows, there is no product without a process (Thanks Meera & Swati!).

    This is me taking notes:

    So, join me in my journey to become SUPERBAKER! ACTION!

    Breads (for those who care, I am referring to the book: "Art & Soul of Baking" by Cindy Mushet)

    Bread is forgiving and resilient. Bread baking is not difficult. Those are the two statements that caught my attention as I began to read this chapter.

    What are the building blocks of Bread?
    • Flour
    • Yeast
    • Liquid
    • Salt
    • Sugar
    Flour
    Wheat flour is the only grain that has ample supply of glutenin and gliaden, the two proteins that are needed to form gluten.

    What makes bread rise?
    The two proteins when combined with liquids and exercised by stirring and kneading form gluten strands. The strands link together and become longer and stronger as the kneading continues. The web of gluten that develops is like a fishing net, woven throughout the loaf of bread. This net traps all those little bubbles of carbon dioxide given off by the feeding yeast and expands as the bubbles proliferate, allowing the bread to rise.

    Why do we use bread flour?
    Bread flour has the optimum percentage of protein. The bread won't rise properly without the proteins mentioned above.

    What if we don't have bread flour?
    Look for unbleached flour.

    Flours that shouldn't be used for breads:
    • Bleached all purpose flour
    • Cake flour
    • and other such low protein flours
    Speciality flours:
    • Rye
    • Corn
    • Buckwheat
    • Spelt
    • Whole wheat - surprisingly whole wheat flour is among these speciality flours. Whole wheat contains the proteins necessary for gluten development but it also contains bran. Bran is the portion of the wheat kernel that actually makes flour healthy and provides the brown colour of the whole wheat. This bran is a drawback when it comes to bread baking as it has jagged edges and it cuts the strands of gluten during kneading.

    Yeast
    Yeast are microscopic single-celled living organisms that make bread rise. The yeast multiply by feeding on the sugar in the starch of the flour. The by-products of their feeding are carbon dioxide and alcohol. In turn, these by-products create the springy soft breads that we love.

    Kinds of yeast
    • Fresh yeast
    • Active dry yeast
    • Instant yeast
    Liquid

    What are the kinds of liquids that we use to make bread?
    • Water
    • Milk or Buttermilk - softens the crumb, this is contributed by the fat in the milk while the sugars give the bread its warm brown colour.
    • Eggs - breads that use eggs are called enriched breads
    Salt
    • Enhances flavour
    • Slows down the fermentation process
    • Hence gives a long and slow rise; this results in better flavour
    • It is hygroscopic, which means that it attracts and bonds with water; salt helps bread stay fresher for longer.
    Sugar
    Is usually added to the warm water to activate the yeast. Yeast loves sugar as much as I do, so everyone's happy!

    Types of bread
    • Enriched breads - breads that contain butter, milk and eggs. This would mean the tastier, fluffier breads.
    • Lean breads - such as baguette, hearth breads that are made with little or no fat. The kind that cut your lip.
    The second classification of bread are of the dough they come from:
    • Straight dough
    • Pre-fermented dough
    I will now move to the recipe as I do not want to irritate you with my lessons as they could go on forever.

    Today I will teach y'all to make Old Fashioned White Loaf (I am trying to sound fancy and cool, but I'm bubbling with excitement because it's the first time I've made bread this good!)


    Ingredients:
    • 1/4th cup warm water (please make sure the water is not boiling hot or too warm as I have learned the hard way that it kills the yeast; and you don't want to kill your sugar-loving friends)
    • 1 tsp sugar
    • 1 tbsp active dry yeast
    • 1 cup of warm whole milk (this means no slim milk!)
    • 2 tbsp of butter
    • 3 cups of bread flour or unbleached all-purpose flour
    • 1 1/2 tsp salt
    • 1 egg, slightly beaten
    1. Mix, rest and knead the dough:
      • Mix the water, yeast and sugar in a small bowl and whisk to blend. The mixture should sit for 10 minutes till the yeast is active, foaming and bubbling.
      • In another bowl mix the butter and milk.
      • In a larger bowl mix the flour and the salt.
      • Now pour the yeast mixture and the milk mixture into the flour and the salt.
      • Mix for about 2-3 minutes till the dough comes together.
      • Cover the bowl with a damp cloth (use a lint-free cotton towel; if you do not have one use plastic wrap)
    2. Rise the dough - first rise:
      • Lightly oil another large bowl.
      • Scrape the dough into the bowl and lightly coat the surface of the dough with oil.
      • Cover the bowl with a damp lint-free cotton towel or plastic wrap for about 45-60 minutes or till the dough has doubled in size.

    3. Punch the dough and shape the loaf
      • Turn the dough onto a lightly floured work surface.
      • Press the dough down firmly so as to expel some of the air bubbles but don't knead the dough again or it will be too springy.
      • Shaping the dough is complicated if I explain it through words so I will try my best. Place the dough in the shape of a rectangle. The size of the pan I used was 9 inches by 3 inches. So, I roughly spread out the dough in these dimensions.
      • I then folded this rectangle into half.
      • Press the part where it joins with the heel of your palm.
      • After this, I turned the dough that currently rested horizontally and I placed it in a 90 degree position or vertically.
      • I then rolled the top end towards the bottom end using my thumbs to tuck in the dough at the seams.
      • Once, the dough had formed a roll I pinched the ends.

    4. Proof the dough - second rise - glaze and bake
    • Lightly coat the loaf pan with oil or butter.
    • Place the dough, seam-side down into the pan.
    • Lightly oil the top of the dough, to keep it moist. Cover the pan loosely with a damp cloth or lint-free towel and allow the dough to rise once more until its top is half an inch to one inch above the rim of the pan. This might take about 45-60 minutes.
    • Pre-heat the oven to 400 degrees Farhenheit / 204 degrees Celsius.
    • Brush the top of the loaf with a thin film of beaten egg.
    • I added sundried tomatoes and parmesan cheese on top of the bread.
    • Bake for 35-40 minutes until the bread is golden brown.
    • Pull out of the oven, let it cool completely and then slice with a serrated knife.
    • Done!
    Suggested serving (with tandoori chicken in mango chutney sauce):

    Tuesday, March 2, 2010

    The Mixed flavours of Snow cupcakes...


    I was missing Amma so much today. As I wallowed in sorrow, I believed baking the cakes she used to bake for me when I got good marks would help. Trust me it worked wonders. I spiced the recipe a little just to add something new. I made some raspberry filled butterscotch cakes, white chocolate and topped with coconut, peanut butter and chocolate chip cupcakes. With this recipe you have enough room to play around. To make this you need,
    • 1/2 cup of flour,
    • 1/2 cup of sugar,
    • 1/2 cup of butter,
    • 2 eggs,
    • 1/2 tsp of baking soda,
    • 1 tsp vanilla essence
    • Now this is where you have fun. The cake is fairly simple and I love experimenting with flavours so I add butterscotch morsels, (of you are in India, mix in some crushed nutties), or add some chocolate chips, I filled the centres of some of the cupcakes with raspberry preserve. Add some peanut butter chips or peanut butter to the batter, add crush mint candies, add pineapple essence or a little bit of cinnamon and ginger. Basically go nuts! Have fun creating your own flavours
    All you need to do is cream the butter and the sugar in together and then add the eggs one at a time. Shift in the flour and baking soda, slowly as you stir. Spoon the mixture into the cupcake tray lined with cupcake wrappers. Bake at 350 for about 20 minutess of till fork comes out clean, when you prick the centre)


    This is one was filled with raspberry preserve and had a butterscotch, peanut butter base. Turned out to be a great combination. I would have never guessed.


    For the frosting:
    I made a fairly plain vanilla buttercream frosting:
    1/2 cup unsalted butter, softened
    3 1/2 confectioners sugar
    1/4 cup milk
    2 tsp vanilla extract

    In a food processor, process butter about 30 seconds or until smooth. Using a spatula, scrape down the sides of the bowl.

    Add the confectioners sugar and process again, about 15 seconds.

    While the motor is running, drizzle in the extract through the small opening in the feed tube.

    Process for another 30 seconds, or until smooth.

    Cooks Note: For a stiffer frosting, add a little less milk or more confectioners sugar. For a glaze, or thinner frosting add more milk or less confectioners sugar.

    This same mixture can also be made in a stand mixer, but add the confectioners sugar on very low speed (or use the bowl cover), as it has a tendency to splash out of the bowl.


    another day of snow.


    It's snowing once again. It gets depressing when it snows so much. The best thing to do is cook and make myself feel better. Today I made some curried noodles and cucumber, pineapple salsa. Curried noodles is a good way to use all the vegetables that might go bad soon. I just chop everything up cook it in a pot with the remains and last drops of all the sauces in my pantry and added some eastern chicken masala to create some more confusion. I know it sounds like such a mess but it tasted great. Just a mix of all kinds of flavours. Just don't go too wild and add mayo or ranch to red wine vinaigrette. Make wise choices. For the salsa, chop some cucumbers, canned pineapples, chillies and mint. Then mix it all together with some lemon juice and chilli powder. Done!

    Monday, March 1, 2010

    Banoffee


    Today was a little frustrating and trying. One thing that annoyed me in particular though was my last post. I read it again this morning, I realised my post made me sound mentally challenged. That was an awful realisation. Well the only thing that seemed to get me in the mood was obviously the part when I got to my kitchen. I was so tempted to make some banoffee pie but I did not have enough condensed milk. I just had what was left from making paysam, so I made this pie-less banoffee. Sounds awful, I know, but trust me it was anything but. All you need is:
    • 1/2 cup of condensed milk dissolved in 1/2 cup of milk,
    • 1/2 cup of brown sugar
    • 1 cup of graham crackers crumbs or digestive biscuit crumbs,
    • 3 tablespoons of butter,
    • Whipped cream for topping
    • about 4 tablespoons of chocolate chips
    Now all you have to do is mix the digestive biscuits with condensed milk dissolved in milk. Then put this mixture into a frying pan with the lump of butter and sugar. Let all the ingredients melt in and become slightly dry (not too dry). Be careful to do this over a low flame, otherwise the whole thing might brown and caramelise too fast. Once it is almost at a fudge consistency turn of the stove and transfer the contents into two small cups or glasses. Now sprinkle the banoffee mixture with the chocolate chips and pop the cups into the microwave for 30 seconds. The chocolate melts on top and gives the banoffee and delicious chocolate frosting. Top it all off with some whipped cream and there it is. Done!
    Oh I also made a ham, raisin, sesame, honey, lettuce, bagel chips salad. Okay, that's a wrap! Done